If you’ve ever stood in a quality control lab for metal parts, plastic components, or even custom fasteners, you’ve probably watched a tensile testing machine pull a sample apart, inch by inch, until it snaps. At first glance, the process looks straightforward: clamp the sample, apply force, record the elongation, and output a curve that tells you everything you need to know about strength, ductility, and yield point. But if you’ve worked with enough of these tests, you’ve likely run into a frustrating problem: two identical samples, tested on two different machines, give wildly different results. One might show a yield point that’s 10% higher, another a breaking elongation that’s far shorter than the material’s published spec. For a long time, I blamed operator error, sample preparation, or even batch-to-batch material inconsistency. Then, as a tensile testing machine supplier, I started digging deeper into the often-overlooked variable that ties every part of the test together: machine stiffness. Stiffness isn’t the flashy feature that grabs a buyer’s attention—no one browses equipment catalogs and filters for “highest stiffness” before “load capacity” or “controller speed”—but it’s the silent force that can make or break your test’s accuracy, repeatability, and reliability. Let’s talk about what stiffness actually means in this context, why it matters, and how it shows up in every test you run. Tensile Testing Machine
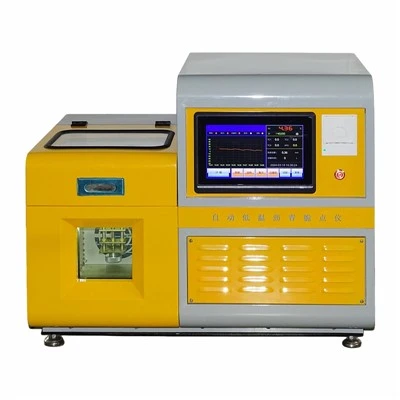
First, let’s define tensile machine stiffness simply, because the technical jargon can get overwhelming. Stiffness is how much force a machine can apply before it bends or deflects. Think of it like pressing on a soda can: if you press a soft soda can, it dents easily (low stiffness); press a steel can, it barely moves (high stiffness). In a tensile testing machine, this deflection happens across every moving part: the load frame’s vertical columns, the crosshead that moves up and down, the grip faces that hold the sample tight, even the coupling that connects the drive motor to the crosshead. All of these parts have their own stiffness values, and together they make up the total machine stiffness, usually measured in Newtons per millimeter (N/mm) or pounds per inch (lb/in). A high-stiffness machine deflects almost nothing when you pull a sample, while a low-stiffness machine will stretch and bend under the same force, even before your sample starts to yield.
Here’s where the problem hits home for actual test results. When you run a tensile test, the two most critical measurements are force and elongation. Force comes from the load cell, a precision device at the top or bottom of the machine that measures how hard it’s pulling on the sample. Elongation is how much the sample actually stretches as force is applied—this is what tells you if a plastic is ductile enough for a packaging film, or if a steel bolt is strong enough for a bridge. The mistake that many labs make is assuming that the crosshead’s movement is the same as the sample’s elongation. That’s only true if your machine is infinitely stiff. In the real world, any crosshead movement has two parts: movement from the sample stretching, and movement from the machine itself deflecting. If your machine is low-stiffness, a big chunk of that crosshead travel is just the frame bending, not the sample getting longer.
Let’s use a real example to make this concrete. Suppose you’re testing a 5mm thick aluminum alloy sample, designed for automotive body panels, with a published yield strength of 270 MPa and an elongation at break of 18%. You run the test on a low-stiffness machine (let’s say 50,000 N/mm) and record the crosshead movement. When you plot force vs. crosshead travel, the curve slopes gently at first, then drops sharply when the sample yields. But when you take that same sample, prepare it identically, and run it on a high-stiffness machine (say 200,000 N/mm), the curve slopes much steeper at the start, and the yield point is 12% higher, with an elongation at break that’s 17.8%—almost exactly the published spec. Why the difference? Let’s do the math. At a force of 13,500 N, which is half the yield strength of your sample (270 MPa times sample cross-sectional area gives a yield force of ~27,000 N), a low-stiffness machine deflects 13,500 N ÷ 50,000 N/mm = 0.27 mm. That entire 0.27 mm gets added to your measured elongation, even though it’s not coming from the sample. Your high-stiffness machine deflects only 13,500 ÷ 200,000 = 0.0675 mm, a tiny fraction. So when you calculate the sample’s true elongation, you’re subtracting that machine deflection from the crosshead travel—and that small subtraction changes the entire curve. For materials that are especially stiff or brittle, like ceramics or high-strength steel, this error gets even bigger. Brittle materials don’t yield; they snap almost instantly. A low-stiffness machine will deflect during that sudden force spike, so the recorded force will be lower than the actual force on the sample, leading you to incorrectly measure the ultimate tensile strength as lower than it really is.
It’s not just elongation and yield strength that are off. Machine stiffness also affects a test’s repeatability, which is non-negotiable for labs that have to meet ISO, ASTM, or other regulatory standards. I’ve had a customer call me a few years ago, panicking because they’d run the same 10 samples of a medical-grade plastic 8 times that week, and each time the elongation results varied by up to 5%. They blamed their lab tech, their sample preparation, even the plastic supplier’s quality control, until we brought in a portable stiffness tester to check their machine. We found their 5-year-old entry-level tensile machine had a stiffness of only 42,000 N/mm, partly from worn crosshead bearings that had developed play, and partly from thin, flexible load frame columns that were never designed for consistent high-accuracy testing. When they moved the test to our mid-range machine with 180,000 N/mm stiffness, the elongation variation dropped to less than 1%, well within ASTM D638’s requirements for plastic tensile testing. That’s the difference stiffness makes: without it, even identical samples will give you random, useless results that can lead to costly rejections, production delays, or even regulatory non-compliance.
Another place where machine stiffness sneaks in is during the “preload” step that every tensile test uses. Before you apply the actual test force, most standards require you to apply a small preliminary force to seat the sample in the grips, eliminate any slack in the system, and ensure the sample is aligned straight (no bending off-center). If your machine is low-stiffness, applying that preload force will cause the frame to deflect, which means when you start measuring crosshead travel, you’re already starting from a displaced position. For thin samples, like 0.1mm thick copper foil used in electronics, that tiny preload deflection can add up to a huge error in elongation. I once worked with a battery component manufacturer that was having trouble passing their internal quality audits because their foil elongation results were inconsistent. They were using a low-stiffness machine that deflects 0.1mm under preload force—for a sample only 0.1mm thick, that means their entire initial measurement was off by 100% before they even started pulling. Switching to a high-stiffness machine with rigid grip mounts and a reinforced load frame eliminated that preload deflection, and their audit results passed on the first try.
Now, you might be thinking: “I don’t need the most expensive machine on the market. My samples are soft, like rubber or foam, so stiffness doesn’t matter.” That’s a common myth, and it’s easy to see why—soft materials stretch a lot more than metal, so machine deflection seems negligible. But let’s test that logic. Suppose you’re testing a rubber gasket for automotive seals, with a typical modulus of elasticity of 10 MPa, and your sample is 100mm long. Your low-stiffness machine deflects 0.5mm at the maximum test force of 1,000 N. That’s 0.5% of the sample’s total length, which might not sound like much, but when you’re measuring the secant modulus— a critical value for how well the gasket will compress and seal— that 0.5% error changes your modulus reading by 5%, enough to make you reject a batch of gaskets that actually meet spec. For high-elongation materials, it’s not that stiffness doesn’t matter; it’s that the error is proportional, so you have to account for it carefully. The good news is that modern high-stiffness machines make that correction automatic: their controller is calibrated to subtract the known machine deflection from every crosshead travel reading, so you get accurate sample elongation without doing manual calculations. Entry-level machines rarely have this built-in calibration, so you end up either doing the math yourself (which is error-prone) or ignoring the deflection entirely (which is even worse).
As a supplier, I want to be clear: machine stiffness isn’t a feature you have to overspend on, but it’s one you should never overlook when choosing a tensile tester. A lot of companies look at load capacity first, but if you’re testing materials that require high accuracy— aerospace components, medical devices, automotive parts, even consumer goods like packaging and textiles—stiffness should be right up there with load capacity on your checklist. The key is to match stiffness to your application: if you’re only testing soft, low-force materials like foam or fabric, a moderately stiff machine might work, but if you’re testing steel, titanium, or high-strength composites, you need a machine with enough stiffness to keep deflection below 0.1% of your sample elongation at maximum force. That’s the threshold where machine deflection stops being a minor error and starts being a major source of test inaccuracy.
I’ve seen firsthand what happens when you cut corners on stiffness. A construction materials lab a couple of years ago used a low-stiffness machine to test rebar for a bridge project. Their results showed the rebar had a yield strength 8% lower than the material’s standard, so they rejected a full truckload of steel—only to find out that the deflection from the machine caused the error. The supplier of the steel offered to retest the rebar on a high-stiffness machine, and the results matched the mill’s spec, saving the lab thousands of dollars in unnecessary costs and avoiding a potential bridge construction delay. On the flip side, I’ve seen a medical device manufacturer switch to a high-stiffness machine and improve their test repeatability by 70%, cutting their inspection time by 20% because they no longer have to rerun tests due to inconsistent results. These are real, tangible impacts that go way beyond just numbers on a screen.
If you’re currently dealing with inconsistent tensile test results, struggling to meet regulatory requirements, or tired of rerunning samples because your numbers don’t line up with material specs, machine stiffness is almost certainly part of the problem. It’s not the only factor, of course—sample preparation, grip design, load cell calibration, and operator training all play a role—but it’s the one that’s easiest to miss when you’re focused on other parts of the test. When you’re evaluating a tensile testing machine, ask the supplier for the total machine stiffness value, and ask how their system accounts for that deflection in test data. A reputable supplier will be able to walk you through the stiffness calculations, explain how their machine is engineered to minimize deflection, and even offer to test your current machine’s stiffness if you think there might be an issue.
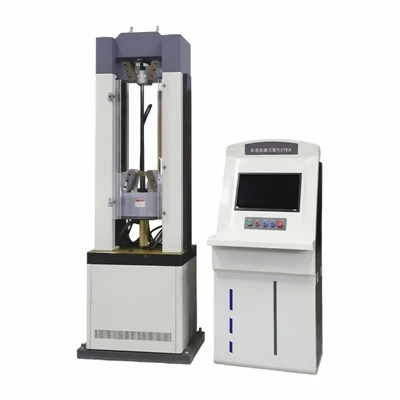
At the end of the day, a tensile test is only as good as the data it produces. Whether you’re testing materials for R&D, quality control, or regulatory compliance, you need results you can trust. Machine stiffness isn’t a buzzword or a fancy engineering detail—it’s the foundation of accurate, repeatable tensile testing. If you’re ready to upgrade your testing setup, or if you want to troubleshoot inconsistent results from your current machine, our team of testing experts can help. We work with labs, manufacturers, and research facilities across industries to match them with the right tensile testing machine, including the right stiffness for their specific applications.
Analyzing Instruments References
- ASTM E8/E8M-22, Standard Test Methods for Tension Testing of Metallic Materials
- ISO 527-1:2019, Plastics — Determination of tensile properties — Part 1: General principles
- Dowling, N. E., Mechanical Behavior of Materials, 4th ed., Pearson Education, 2019
- Hibbeler, R. C., Mechanics of Materials, 10th ed., Pearson Education, 2017
- Blaine, D. V., Tensile Testing: A Guide to Understanding and Applying Test Results, ASTM International, 2008
Hebei Wanluda Testing Instrument Equipment Co., Ltd.
As one of the most professional tensile testing machine manufacturers and suppliers in China, we have world-leading production equipment and strong manufacturing capabilities. Please rest assured to buy advanced tensile testing machine made in China here from our factory.
Address: Zhouguantun Village, Xian County, Cangzhou City, Hebei Province, P.R.China
E-mail: wldinstrument@163.com
WebSite: https://www.wldinstrument.com/
